The Hot Rod/Sweeter Spot Build (NAS edition)

First hurdle - stuck at CPU cooler installation
The brackets I checked were compatible, and followed right instructions.
AMD.
They're saying I should mount parallel to ram sticks but I don't see how.

Only way and good how I've got it?
 

Attachments

  • 1000024612.jpg
    1000024612.jpg
    206.8 KB · Views: 56
  • 1000024610.jpg
    1000024610.jpg
    218.8 KB · Views: 54

steelghost

Ars Tribunus Angusticlavius
6,230
Subscriptor++
So, this is because the socket on your board is rotated 90° away from "normal". So, with the hardware they supply, mounting it as you have it is your only option. And to be clear, it will work just fine like that.

However, if you decide or find you want or need to mount it parallel to the DIMMs, you can buy alternative mounting hardware to allow that. I believe for the NH-D9L you'd want this one https://www.noctua.at/en/products/nm-amb13

Either way, you can for sure do all the testing and setup like this.
 
  • Like
Reactions: continuum
Alright, at the post test stage, not yet in case. RAM wise - is this right?

Technically, your EPYC 4465P supports up to 5600 MT/s, but there is a major catch when you use 192 GB (4 sticks).

On the AM5 platform, RAM speed is determined by how many "seats" (slots) are filled and whether the sticks are "Dual Rank" (which all 48GB sticks are).

The Speed Reality for 192 GB (4 Sticks)​

ConfigurationOfficial Max SpeedReality for Your Build
1 Stick5600 MT/sMaximum possible speed.
2 Sticks5200 - 5600 MT/sStandard high-speed workstation setup.
4 Sticks (192GB)3600 MT/sThe official validated speed for 4 dual-rank sticks.

Why is it 3600 MT/s?​

When you fill all 4 slots with 48GB modules, you are putting a massive amount of electrical "stress" on the CPU's memory controller. To ensure your data doesn't get corrupted and the system doesn't crash, the motherboard and CPU automatically "downclock" the RAM to 3600 MT/s.

Peer Tip: You might see "5200" or "5600" printed on the RAM sticks themselves. That is their potential speed, but in a 4-stick configuration, the EPYC platform prioritizes stability over raw speed.

Can you go higher?​

Yes, you can manually try to set it to 4800 or 5200 in the BIOS, but be warned:

  1. Instability: It may cause random blue screens or "silent" data corruption.
  2. Longer Boots: The system will have to re-train the memory every time you change this, which takes 15+ minutes.
  3. The "Sweet Spot": Most users with 192GB find that 3600 MT/s or 4400 MT/s is the maximum stable limit for 4 sticks.
 

steelghost

Ars Tribunus Angusticlavius
6,230
Subscriptor++
What's the consequences of this vs. what I thought I'd be getting with 5600? :\
Huge, zero?
Surprised by this.
Honestly, for your planned use case it pretty much doesn't matter. The speed of your hard drives will be the limiting factor first of all. If you upgraded to some super fast NVME drive array, you'd then be limited by your 10G network link. If you upgraded that to 25G, well, maybe then RAM speed would start to matter, a bit. But the write speed of the drives in your client devices would probably be a problem before that.
 
  • Like
Reactions: continuum
Posted fine! Somehow it did the RAM stuff? Didn't seem to need to wait there oddly.

I was struggling to get the m2 screw off without threading it... had to buy a 132 in 1 kit, which came quickly from amazon.

Got the m2's in; but no heatsink yet (on the way).

https://www.ebay.com.au/itm/235790075321?var=536170970435 = seemed to indicate would do the job vs. $$$

Couldn't find anything else in stock. Annoyingly seems like those ebay ones will come by March 11?!

How bad is it with them overheating? In the IMPI I can see severity showing, 73C for one of them... this is no fans on them though; out on the box still in POST testing...

Should I be waiting to install iOS after putting into case? with fans etc.
 
  • Like
Reactions: continuum

steelghost

Ars Tribunus Angusticlavius
6,230
Subscriptor++
Those heatsinks with the little rubber bands are a bit of a liability, in my experience. The heat causes the rubber to harden and crack, meaning the thermal pad is the only thing holding the heatsink on. Sometimes it succeeds, sometimes it doesn't, but there is no mounting pressure so even if the heatsink remains attached, it's not very effective. Rememeber, it only needs a very slight gap to render a heatsink worse than useless, since it would be blocking any airflow that would otherwise cool the SSD, but it's not in contact with it, so it's achieving nothing itself.

I've worked around this by using thin cable ties to hold them in place, but it's not ideal. This is why I suggested ones that attach with screws. I do appreciate local availability of such things can vary.
 
I'd say - start by validating everything, step by step. Here's roughly how I'd go about it (I'm assuming each step goes to plan)

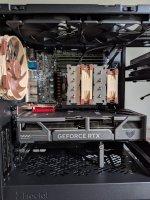
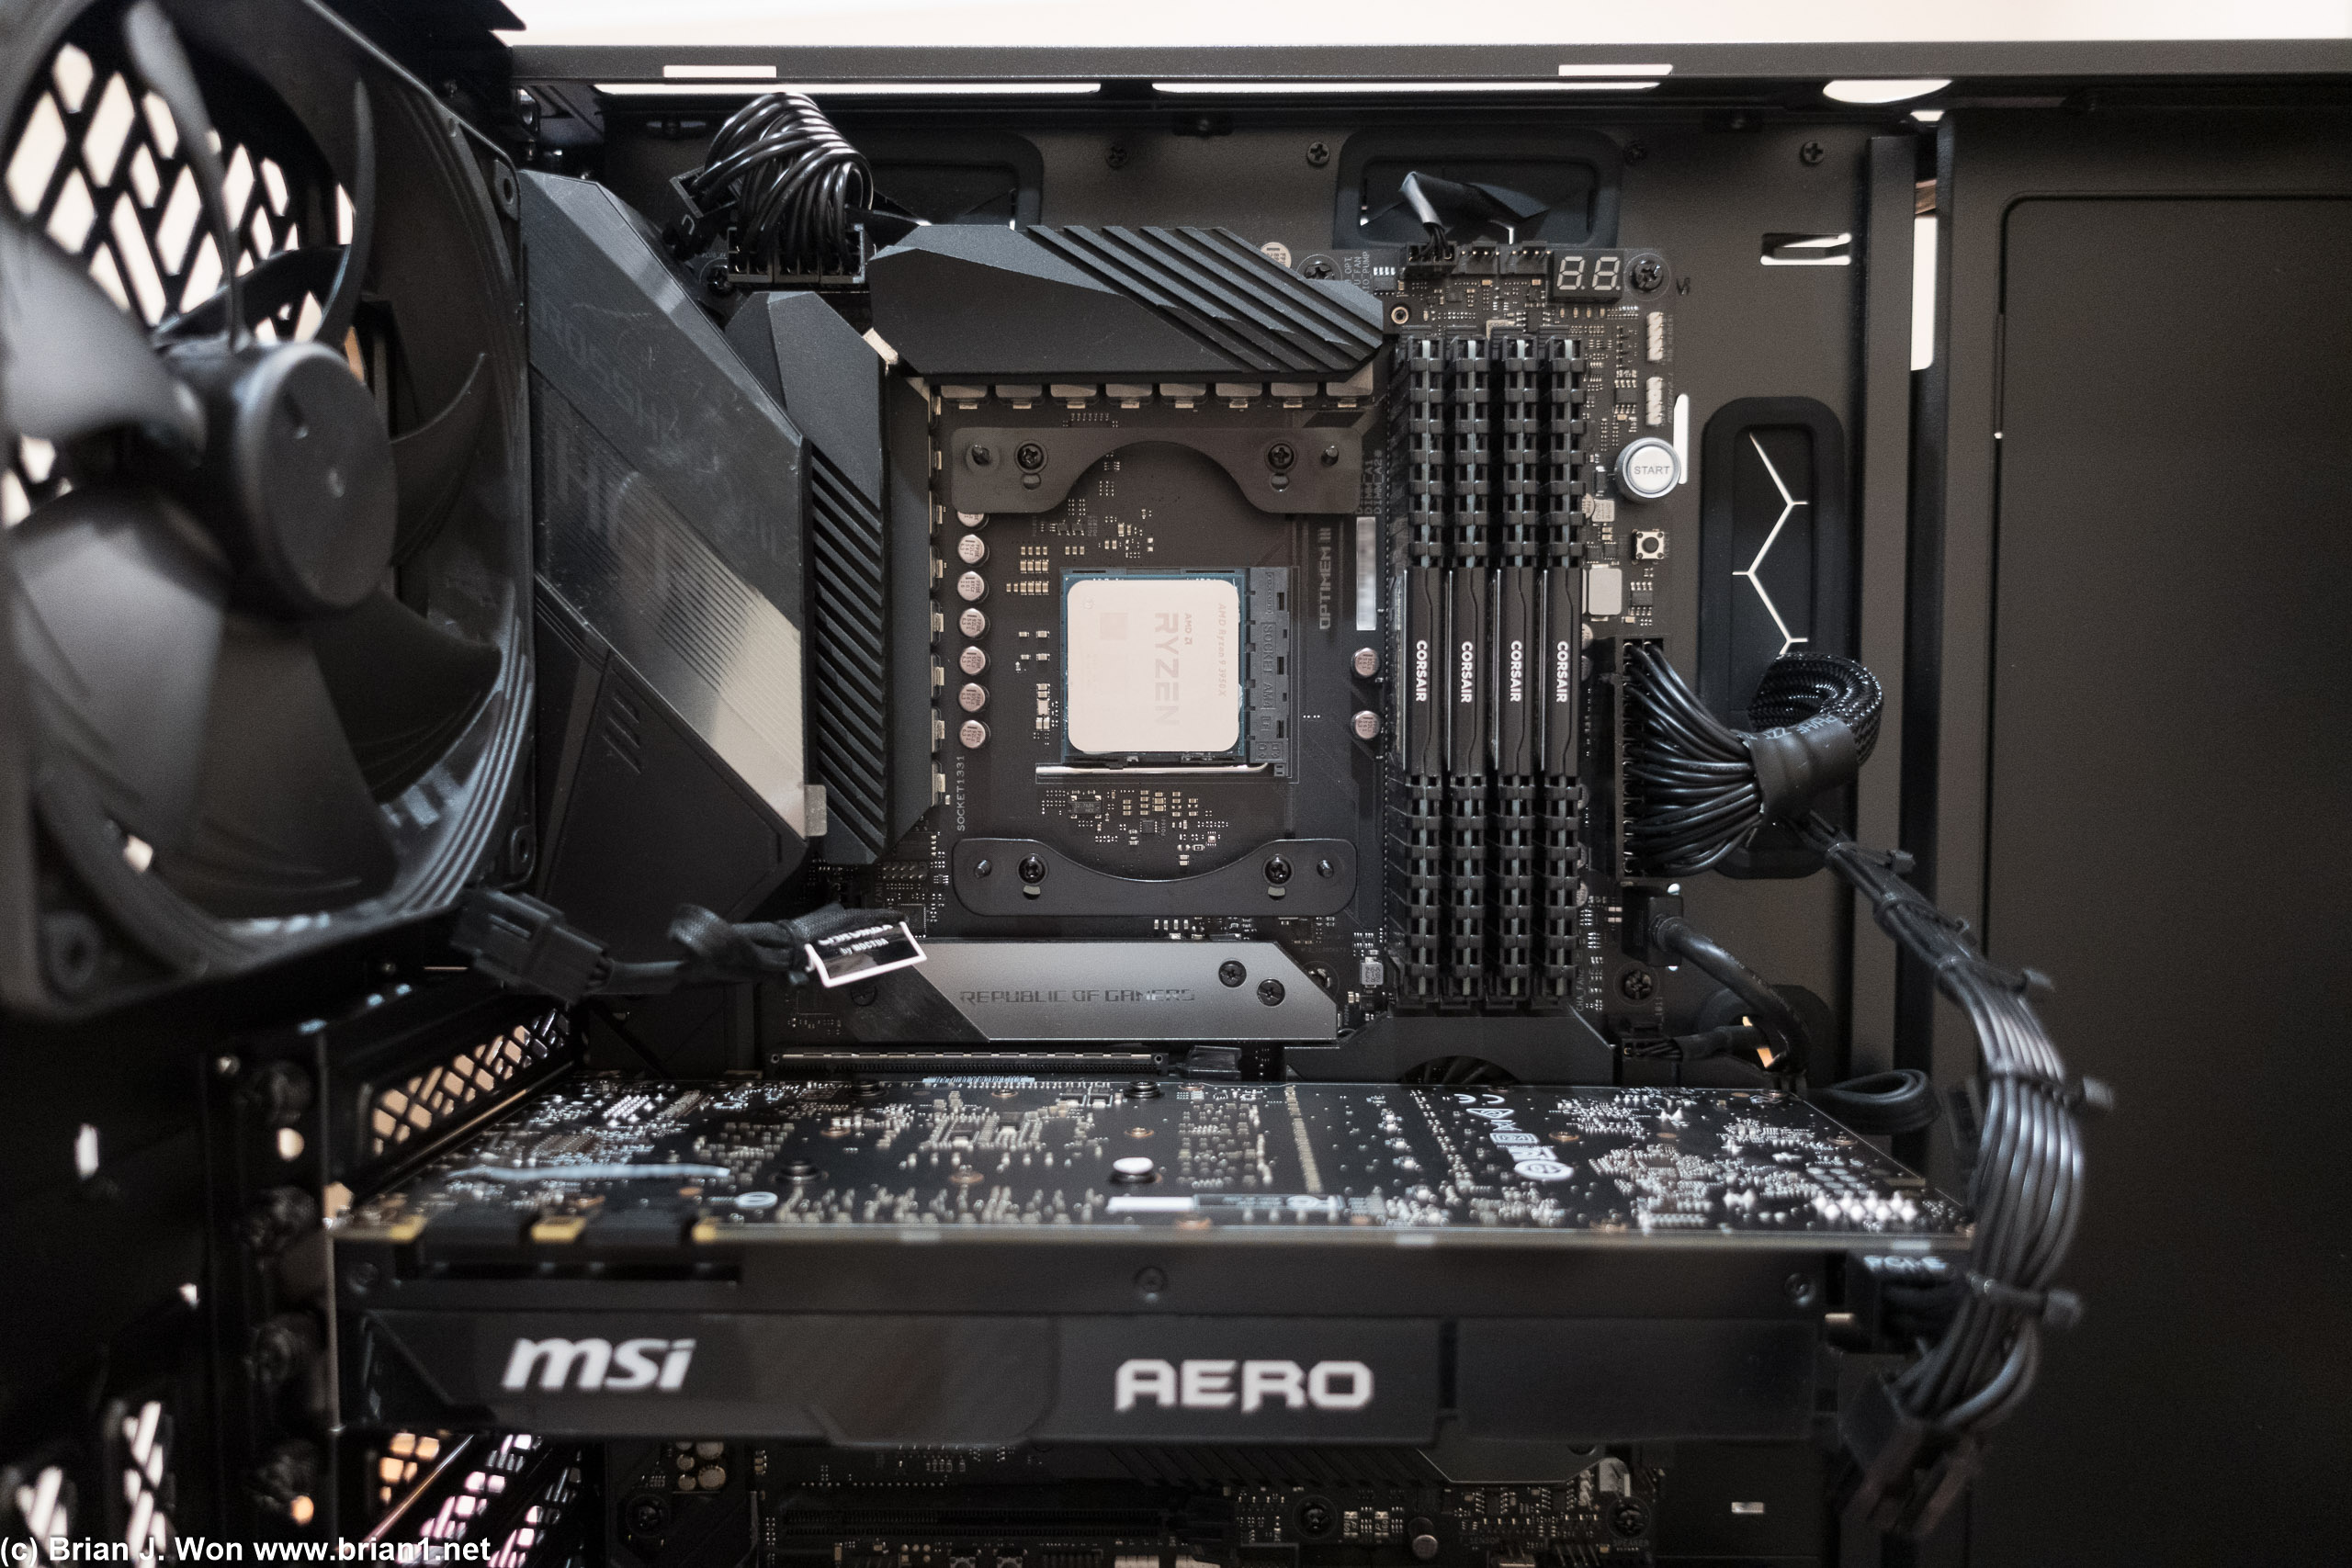
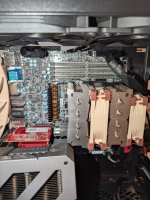
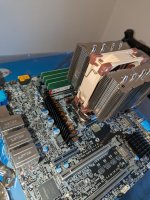
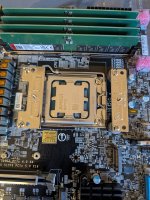
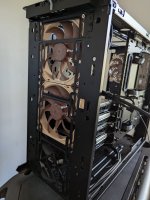
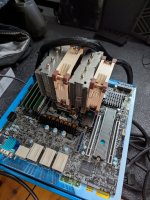
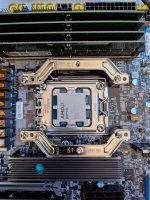
CPU in board, fit heatsink, add RAM, do a "test POST" outside of the case (commonly done by sitting the board on top of the box).

After confirming successful initial POST (may take a while - like, 15m or more - because you have a lot of DDR5 in this build), fit heatsinks to SSDs and install them, confirm they are seen by the system

Update IPMI and UEFI to latest firmware versions

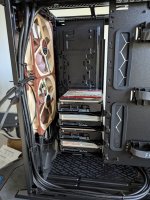
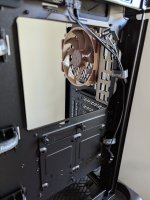
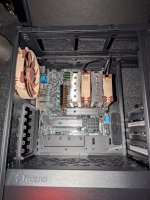
Prep your case, install fans, drives, PSU, pre-route your SATA cables, etc etc.

Do some basic validation of the hardware stability eg run MemTest86 overnight (at least). Try using eg some stress testing routines off a linux boot drive

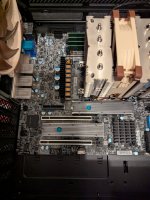
Once you're happy the core hardware is basically functional, install board, connect your drives, check they are seen. Install NIC, GPU, use your bootable linux USB to check your GPU is seen and functional

Now you can install Proxmox, do your updates, set up your repositories, etc

OPTIONAL: Pre-test your new drives with the badblocks command

Now you can set up hardware passthrough for your SATA controller(s), set up your VMs (inc TrueNAS) and start moving data over

Current state:

  • Switch setup.
  • Mobo -posted, updated IPMI and have latest proxmox setup on M2's.
  • Not done any setup of case yet, will do next.
  • Essentially wanting to avoid m2's overheating and putting it all in the case, then a few weeks time having to get back out... so atm it's living in the open air, and there's a big ass fan for my indoor trainer pointing at it. Seems to suffice. Not sure how much heatsinks will matter.
  • If I have already installed proxmox though? That was last? Should I not be doing much in there until GPU in etc etc?
  • Wondering what I can get done/setup before having to put it all in the case.
 
Those heatsinks with the little rubber bands are a bit of a liability, in my experience. The heat causes the rubber to harden and crack, meaning the thermal pad is the only thing holding the heatsink on. Sometimes it succeeds, sometimes it doesn't, but there is no mounting pressure so even if the heatsink remains attached, it's not very effective. Rememeber, it only needs a very slight gap to render a heatsink worse than useless, since it would be blocking any airflow that would otherwise cool the SSD, but it's not in contact with it, so it's achieving nothing itself.

I've worked around this by using thin cable ties to hold them in place, but it's not ideal. This is why I suggested ones that attach with screws. I do appreciate local availability of such things can vary.
I've gone and ordered them too. From UK. So annoying, seemingly no local stock of anything.
 
  • Hug
Reactions: steelghost

steelghost

Ars Tribunus Angusticlavius
6,230
Subscriptor++
Nothing to stop you putting it in the case, in as much as you can readily add and remove the SSDs while it's in there.

You can also change the CPU heatsink mounting over (when you get the new hardware) while it's in the case. I like to get things into a case as soon as I reasonably can to avoid risk of things getting knocked or whatever, but that's just me.

If you're concerned about the SSDs getting too hot (and at 73C at idle, you're right to be concerned) just remove them and put them back in their packaging. Then you can use a bootable linux USB drive to validate the other hardware (NIC, GPU, etc) when it's in the case. Once you get the heatsinks, you can pop the SSDs back in. There's nothing to stop you using the SSD heatsinks you have by the way - the problem with those ones is that they do work at first, it's when the rubber bands fail after a few months that you then wonder why your SSD is throttling / getting so warm. But as mentioned, it's not difficult to take the SSDs in and out when the board is in the case.

I mentioned installing Proxmox last because conceptually, that's how I think of it. But installing the OS (so long as you have it mirrored across the drives?) before you physically put the board in the case is absolutely not an issue. It just means that you can't really configure much in Proxmox because you don't have your main NIC, or your GPU, installed.

I would prep the case next, meaning get the PSU installed, route the cables to the right places (don't forget power for your GPUs), install the 3.5" drives, work out where your fan connectors are, that sort of thing.

I would also suggest having a go at setting the fan thresholds in the IPMI. This is something you'll need the ipmitool command for, but that's available in any linux distro, so could be done from your linux live USB. Have a read of this for more on that.

Note, this will not control or set your an speeds - it will merely stop the BMC from freaking out when your nice big quiet Noctuas spin down to a speed lower than the expected minimums that are set from the factory, which are expecting to control extremely high speed (and loud!) fans that you would typically find in a rackmount server. This setting will persist in the BMC once set, so it doesn't matter if you're setting it under Ubuntu or Fedora or whatever.

I would probably set your fan control profile to "heavy IO" in the IPMI interface, and see how you go with that. If necessary we can look at setting the fan speeds manually, but that's a little more involved so trying the built options first is advisable.
 
  • Like
Reactions: Conza88
Current state.
The better nvme heatsinks arrived from Jeyi. Both on and have it sandwiched. Will be interesting to see how much temp drop.

I thought I may as well use one of the fractal fans and made space to have it at the bottom, so 3 in the front. Issues to consider here?

I think I will keep the cage at the bottom (not in pictures) to put the from old Nas eventually. What is annoying me: on the shroud wall, with the fractal logo it's in the way of any future HDDs (above the current 4 HDDs). I can't figure out how to remove it.
 

Attachments

  • 1000025004.jpg
    1000025004.jpg
    124.1 KB · Views: 45
  • 1000025005.jpg
    1000025005.jpg
    171.4 KB · Views: 41
  • 1000025006.jpg
    1000025006.jpg
    106.6 KB · Views: 41
  • 1000025007.jpg
    1000025007.jpg
    204.6 KB · Views: 50

continuum

Ars Legatus Legionis
97,775
Moderator
I thought I may as well use one of the fractal fans and made space to have it at the bottom, so 3 in the front. Issues to consider here?
From your photo looks like it's installed backwards-- everything should be intake (so you need to flip the Fractal fan).

If there's a hard drive directly in the path of the Fractal fan then makes sense to add it, but if there's no components in the airflow path it's probably not necessary.

As far as hard drives:
https://www.fractal-design.com/app/uploads/2023/08/Define-7-Manual-V.3-2023-08-21.pdf

PDF page 10? Shows a 360mm radiator but your 3x fan setup (without a radiator) should be fine.

Doh. Thanks for the pickup on the fractal fan.

I plan to have the HDD's from old nas in the path down the bottom there; in cage because atm - can't get the multi-bracket(?) thing to be moved.

It's not clear in the manual either.
 

continuum

Ars Legatus Legionis
97,775
Moderator

continuum

Ars Legatus Legionis
97,775
Moderator
Soooooo you have a server-market/enterprise motherboard to use with a consumer market heatsink, fitment is probably not really tested with that particular combination. NH-D9L is not a large heatsink but as you're finding, CPU socket is very tight on your motherboard (it's within AMD spec, but probably right at the minimums).

They're saying I should mount parallel to ram sticks but I don't see how.
If you want to keep using the NH-D9L, you probably need give up on this.
 
  • Like
Reactions: Conza88

steelghost

Ars Tribunus Angusticlavius
6,230
Subscriptor++
Depending on the degree of interference you could potentially file / sand a little bit off the side of the m.2 heatsink. Of course, you'd do this after having removed it from the SSD and you'd need to clean it up very carefully before refitting, to avoid any metal dust getting in places it shouldn't.
 

steelghost

Ars Tribunus Angusticlavius
6,230
Subscriptor++
Your 10G NIC is a x4 card so yes, makes sense to put it in the top slot. Second slot is your main x16 to the CPU so again, your second slot makes sense.

This leaves you with the last slot, which is x8 lanes. Looking at the block diagram in the manual, it looks like if you install a card in that bottom slot, the board will route x8 lanes away from the x16 slot to provide connectivity to the bottom slot. This would leave your GPU operating on "only" x8 lanes, but this is not typically a major performance hit, and would be weighed against the utility of whatever card you might decide to install in that bottom slot in the future.

1771412589349.png
 
  • Like
Reactions: continuum
Ok. My gawd, the NVIDIA Asus tuf 5060ti essentially doesn't fit.
I removed all the barriers, tried all angles. No dice.

Coming straight down into the case doesn't work, it gets stuck on the stainless steel 304 plate on the top near the HDMI, dp slots.

I tried going through the gap bottom left, but can't turn it fully to click in.

Options?

Possibly unscrew the stainless steel 304 plate? Get it into position, then rescrew on?
 

Attachments

  • 1000025019.jpg
    1000025019.jpg
    230.2 KB · Views: 47
  • 1000025017.jpg
    1000025017.jpg
    69.1 KB · Views: 49
  • 1000025016.jpg
    1000025016.jpg
    73.6 KB · Views: 48

steelghost

Ars Tribunus Angusticlavius
6,230
Subscriptor++
I'm not clear what isn't fitting - is the GPU length too much and it's clashing with the hard drives?

If I'm plugging in a GPU I will generally offer it up a couple of centimetres back from the slots and only move it forward just above the board so that the tabs at the bottom of that steel plate go into the little "loops" that are usually punched in the case, and the edge connector of the card goes into the slot on the motherboard.

Edit: I see the issue now - per the website the length of the GPU is 302mm, and per the case manual...

GPU max length 290 mm storage layout, 470 mm open layout, 445 mm open layout with fan

Feels like you should be able to make it work by shifting a couple of your 3.5" drive trays up a bit to allow the GPU shroud to protrude into the volume that would normally be occupied by hard drives?
 
  • Like
Reactions: Axl
I'm not clear what isn't fitting - is the GPU length too much and it's clashing with the hard drives?

If I'm plugging in a GPU I will generally offer it up a couple of centimetres back from the slots and only move it forward just above the board so that the tabs at the bottom of that steel plate go into the little "loops" that are usually punched in the case, and the edge connector of the card goes into the slot on the motherboard.

Edit: I see the issue now - per the website the length of the GPU is 302mm, and per the case manual...

Ah man. Is it because it's a TUF or something?

Feels like you should be able to make it work by shifting a couple of your 3.5" drive trays up a bit to allow the GPU shroud to protrude into the volume that would normally be occupied by hard drives?
Likely yes, but I can't shift them up because there's that back plate thing right in the middle and I can't get the shroud/cover of the storage wall off to access it 😅.

Thoughts on taking off the plate on the GPU and then trying to fix back on when in position?

Edit: ok - man figured out how to get that shroud removed...

Here. "On the bottom left side of the picture, you can see the point to attach a zip tie. Just above you see a [ ] shaped plastic tab. You should see 3 of those. Press these tabs to remove the panel. You should be able to wiggle out the panel without removing fans."
 
It seems like the front steel plate last bit is the hurdle and it could jam in... and I reckon I could get it in then put back on...
But going with the moving the drives up... since I got that back off thing worked out.

I have 2 of the fractal fans hanging around ... and I've now put them with the air pushing out at the top middle, top back - yay / nay?
 

steelghost

Ars Tribunus Angusticlavius
6,230
Subscriptor++
I have 2 of the fractal fans hanging around ... and I've now put them with the air pushing out at the top middle, top back - yay / nay?
It's probably somewhat overkill, depending on how hard you work the GPU and CPU, and the ambient temperatures in your house. But keeping it all well ventilated and thereby hopefully in happy operating conditions is a cheap way to give it as much longevity as possible (y)
 
Managed to get the grill in but now wondering whether I should?
There's a vent of sorts from the GPU in last image. It could have an open grill/no cover there, but then there's a pretty sizeable gap on the far left of it for dust etc to get in?

Should I leave the grill there? Or remove?

I also see why I should do GPU last after cables 😅🤦‍♂️
 

Attachments

  • 1000025027.jpg
    1000025027.jpg
    165 KB · Views: 41
  • 1000025028.jpg
    1000025028.jpg
    121.2 KB · Views: 45
Struggling with the fractal design 7 AND installing 24-pin ATX main power cable into the JPW1 header...

Cable goes from the PSU area at the bottom to the back side, then up out of the top part of the case from the back into the main case area.
Basically impossible for it to come out, then immediately come back on itself. Not that long to go other ways as easily
 

steelghost

Ars Tribunus Angusticlavius
6,230
Subscriptor++
You often have to be more robust with handling those cables than you might have expected! You may find it easier to detach it at the power supply end, put the other end through the grommet and plug it in, then you can use some tension on the cable to help it turn that corner as sharply as possible.

If it really isn't going to reach even after doing that, you'd need to look at ATX power cable extensions. Such things are commonly available and fairly inexpensive.
 
  • Like
Reactions: Conza88

continuum

Ars Legatus Legionis
97,775
Moderator
Also you don’t have to use the back side cable routing if you don’t want to, it’s just prettier that way.

(Spoilered because big)
dsc02355.jpg

dsc02338.jpg

This is from a Meshify 2, not a Define 7, but yeah, definitely looks tight, especially if your PSU has sleeved cables. The ATX12V/EPS12V cable at top left is only 8 wires, not 24 (like the main ATX power connector at right) and I can see how that would be a pain. If you have sufficient length and prefer to run the cable via the back, you could pull more cable through the slot to see if that works before bending it back in a 180 degree turn to the connector as well, but that might not be any prettier.

Or extensions as @steelghost said.

There’s actually some 180 degree adapters too, like this one, but note I’ve not used this particular one nor have I checked the orientation of the plugs (/nor the PCB length) to see if it would work for you.
 
  • Like
Reactions: Conza88

steelghost

Ars Tribunus Angusticlavius
6,230
Subscriptor++
The challenge with this particular board looks to be the location of the main ATX connector, which follows the convention for mATX server boards in being right at the top, rather than midway down on the right edge as with many "normal" consumer boards.

@Conza88 no harm in bringing the ATX cable though the grommet opposite the upper pair of hard drives, if that will give you the slack needed. But you don't want the cable to be pressing on the DIMMS, of course. If it has to be super tight to reach no matter what you do, just ordering an extension is the way to go.
 
Thanks gents.

Managed to work that through the side.

Some remaining questions - excuse the current work in progress hot mess;

USB C cable from front panel io; can't figure out where on the board that is meant to go.

Fans and cables - I have CPU fan 1&2 in those fan1/2. How to handle the front 3 fans together? Although 2 - noctua and one fractal, that going to matter?

There's a pwm cable? And another sata cable connected to the case?

I then have the top two fractal case fans. Where to add those?

Where should the noctua rear exhaust fan connect to? Fan 5? (Closest?)

Anything I may be missing? Or comments from photos of WIP.

Also can I use for the Noctua front fans - a Y cable -> to an extender cable -> so it can each the Fractal hub?
 

Attachments

  • 1000025049.jpg
    1000025049.jpg
    169.1 KB · Views: 49
  • 1000025050.jpg
    1000025050.jpg
    194.7 KB · Views: 40
  • 1000025051.jpg
    1000025051.jpg
    175.4 KB · Views: 37
  • 1000025053.jpg
    1000025053.jpg
    145.1 KB · Views: 38
Last edited:

evan_s

Ars Tribunus Angusticlavius
7,470
Subscriptor
Looking at the specs for your MB it doesn't have a USB-C header so that's why you can't find any place to hook that up. They do make adapters to hook it up to a USB3 or USB2 header. Random no name example:

https://www.amazon.com/JoyReken-Vertical-Socket-Header-Adapter/dp/B08TW9S7B3/

For fans it probably doesn't really matter where you hook them up to the board. If they are all the same type (3pin vs 4pin) you should be able to hook them up with a Y cable. To be safe I'd keep everything on the hub the same but if it's nice enough it might support mixing 3 and 4 pin fans.
 

continuum

Ars Legatus Legionis
97,775
Moderator
@evan_s covered just about everything.

Fan power cables that support both 3-pin (not PWM) and 4-pin (PWM) fans are pretty common, i.e.: 2-way and 3-way.
There's a pwm cable? And another sata cable connected to the case?
Not quite sure what you mean here, sounds like a case fan hub?

https://support.fractal-design.com/support/solutions/articles/4000174729-define-7
The Nexus+ 2 fan hub is a PWM fan hub which distributes the signals from the main header to the rest of the fans, making them go at the same percentage of their maximum speed.
 
  • Like
Reactions: Conza88